Pages

Saturday, December 15, 2012

Festive Party Spirals

We had a family Christmas party today and I needed bring an appetizer.  Well, I decided to take a favorite of mine-the party spiral- and make it a little more festive.  Have you ever seen the green tortillas in the bread aisle?   I had never tried them, but thought they would look so pretty with bright red pimientos in that cream cheese center.  They were delicious and looked adorable assembled as a little wreath on my platter!  If you want to see my Ranch Party Spiral recipe or learn how to make them, go HERE.  I just changed a few things from that recipe to come up with this one!


Simply arrange them on the rim of a plate to make your wreath.  The bottom has two rows of spirals and I put one row on top.


Festive Party Spirals
6 - 10" green tortillas ( I used Mission brand- Garden Spinach Herb)
2 8 oz. pkgs. cream cheese, softened
2 green onions, chopped (both white and green parts)
1/2 pkg. dry Ranch dressing mix
4 oz. chopped pimientos, DRAINED WELL (I let mine drain on paper towels to get them very dry.)
 
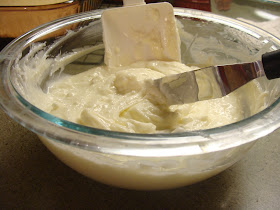
Mix cream cheese, chopped green onion, and 1/2 pkg. Ranch dressing mix in medium bowl.  Spread mixture evenly among the 6 tortillas.  Spread the mixture over entire tortilla.  Sprinkle pimientos evenly among the 6 prepared tortillas.  (I wish I wold have taken a pic of the inside of the tortilla before rolling.  I would say no more than a teaspoon of pimientos per tortilla.  It really doesn't take very many.)  Roll each tortilla tightly.  Cover and refrigerate for at least an hour (or even overnight).  Cut each tortilla into 3/4" slices.  Keep refrigerated!
 
 
Shared on:


Wednesday, December 5, 2012

Turtle Bark

When I saw this recipe from Chocolate, Chocolate and More Chocolate, I knew I had to try it!  These are sooooo AMAZING!!  They are also quick and easy to make!  I only deviated slightly from the original recipe.  I used my favorite melting chocolate-Peter's Westchester caps instead of the chocolate bark.  (Local friends- you can get the candy melts at the Cake & Candy Connection in Moweaqua.)  I used 20 oz. of the caps, 1 bag of the caramel bits, and 6 oz. of pecan halves.


Place the chocolate in a microwave safe bowl.  Melt in microwave.  I do this 20 seconds at a time, stirring in between.  I HIGHLY recommend sticking to the 20 second intervals.  The chocolate will melt quickly.  It will likely only take a minute or so total time to get it completely melted.

Get your pecans and caramel bits open and ready to dump in the chocolate!

The chocolate is ready!

Pour in the caramel and pecans and coat well!

Pour mixture onto a cookie sheet lined with wax paper and spread to desired thickness.

 
Look at all those bits of caramel and pecan!!!
 
Turtle Bark
 
 
20 oz. chocolate candy melts (or chocolate almond bark)  I used Peter's Westchester caps- Wilton makes candy melts too.
1 package Kraft caramel bits
6 oz. package of pecan halves
 
Place chocolate in microwave safe bowl and melt in microwave at 20 second intervals stirring in between until completely melted.  This will take about 1- 1 1/2 minutes total.  Add pecan halves and caramel bits to the melted chocolate and coat completely.  Pour mixture onto a cookie sheet lined with wax paper.  Spread mixture to desired thickness making sure it is evenly distributed.  Cool on counter or in fridge until set.  ( I put mine in the fridge for about 15 minutes.)  Cut into desired size pieces and store in an airtight container.
 
Shared on:


Tuesday, December 4, 2012

Glazed Pecans

Several years ago I hosted a Christmas goodie/cookie exchange for my sorority sisters.  It was so much fun and there were so many delicious treats.  We also exchanged the recipes as well!  One of the ladies brought these pecans to share and they were wonderful.  I've made these many times over the years.  I even made them for my sister-in-law's baby shower and they were a hit.  These are super easy and so delicious!  Hope you enjoy!  (P.S.  These are great to make before you have company coming!  They will make your house smell wonderful!!)


 You will need a 1b. of pecan halves, 1 egg white, 1/2 cup sugar, 2 T. lemon juice, and 1 tsp. cinnamon.

 
 Mix egg, sugar, lemon juice and cinnamon in large bowl.

 
 Add pecans and coat well.

 
Place on cookie sheet LINED WITH PARCHMENT PAPER!  Bake at 250 degrees for one hour, stirring every 15 minutes. 


Spread on parchment paper to cool.  (Note:  Use a clean piece of parchment for the cooling!)


Enjoy!
 

Glazed Pecans

1 egg white
1/2 cup sugar
2 T. lemon juice
1 t. cinnamon
1 lb. pecan halves

Mix first four ingredients in large bowl.  Add pecan halves into mixture and coat well.  Spread pecans on parchment paper lined cookie sheet or jelly roll pan.  Bake at 250 degrees for 1 hour stirring every 15 minutes.  Spread on parchment paper to cool.

Shared on:

Everyday Mom's Meals


Monday, November 5, 2012

Pumpkin Lush

Chocolate lush is one of my favorite desserts.  Truth be told, I love most refrigerator desserts!  So when I found out there was a pumpkin spice pudding being sold in the fall, I knew I had to try to make a pumpkin lush!  This is sure to be a crowd pleaser!  Hope you enjoy this one!!


I thought I was never going to find this pudding!  I stocked up when I finally found it!!  This recipe calls for two packages of the pumpkin spice pudding!

Preheat oven to 350 degrees.  In a medium bowl, combine the flour and butter using a pastry cutter until well blended. 

 
In a medium bowl, combine the flour and butter using a pastry cutter until well blended.  Press into the bottom of a 9x13 pan.  Bake for 25 minutes or until lightly golden.


Allow the crust to cool completely.

 
 Mix softened cream cheese with sugar. . .

 
 Mix pudding mix and milk. . .

 
 Top crust with cream cheese mixture. . .

 
 Add pudding mixture. . .

 
Finally, top with Cool Whip!  Note: I didn't quite use the whole container of Cool Whip.  I needed to be able to put the lid on my pan.  Use your own judgment here!!  :)


Note:  I will warn you that this dessert can be a little messy to serve.  It might help to set it out on the counter about 5 minutes before serving so it is easier to cut.  Messy is good though!!  This is soooo yummy!!!  Enjoy!!

Pumpkin Lush

2 cups all-purpose flour
1 cup butter, softened
2 8 oz. pkgs. cream cheese, softened (I used 1/3 less fat cream cheese.)
1 cup sugar
2 pkgs. (3.4 oz. size) Pumpkin spice pudding
3 1/2 cups milk
12 oz. container of Cool Whip

Preheat oven to 350 degrees.  In a medium bowl, combine the flour and butter using a pastry cutter until well blended.  Press into a 9x13 baking dish.  Bake for 25 minutes or until lightly golden.  Allow crust to cool completely.

In a medium bowl, beat the cream cheese and sugar until smooth and well blended. Spread evenly over the cooled crust.  In another bowl, whisk together the pumpkin spice pudding mix and milk for 3-5 minutes.  Spread over the cream cheese layer.  Top with Cool Whip.  Store in refrigator. 

Note:  I recommend making this dessert the night before you plan to serve it.  :)

Shared on: 

Thursday's Treasures

Saturday, October 6, 2012

Five Can Soup

I found this recipe on the internet several years ago while doing Weight Watchers.  I can't tell you what website because I never wrote it down.  I don't believe this is a Weight Watchers recipe, but was just one that was recommended as a good recipe to use when watching your calories, etc.  I just happened to be following WW at the time and it fit well with their program.

It's been a long time since I made this and was wanting something low cal to have on hand this weekend because we will be eating out twice this weekend and I'm still trying to shed some baby weight.  This soup will be perfect!!

This is such a super easy soup recipe and it would be so easy to "dress it up" a bit.  You could add some shredded chicken,  a can of your favorite beans, or even some pasta!  Even with another addition, you could even keep the calories low too!  Hope you enjoy this one!


Here's what you'll need!  1 can chicken broth, 1 can diced tomatoes, 1 can diced new potatoes, 1 can zucchini with Italian style tomato sauce, 1 can sliced carrots.  That's it!!  (You can add a little salt & pepper if you like!)  I added about 1/2 tsp. of salt and pepper.  Next time, I'll only add about 1/4 tsp. of the pepper. 

 
 Here are the tomatoes and zucchini going in the soup pot!  The tomato sauce that the zucchini is in gives this soup its flavor.

 
 Then add the potatoes. . . drain those!!!

 
 and the carrots. . . drain those too!

 
 Add the chicken broth and simmer for 10-15 minutes!

 
Five Can Soup
 
 1 can chicken broth
 1 can diced tomatoes
 1 can diced new potatoes, drained
 1 can zucchini with Italian style tomato sauce
 1 can sliced carrots, drained
 
Put all ingredients in large sauce pan and simmer over medium heat for about 10-15 minutes.


Friday, September 21, 2012

Flourless Chocolate Cake

One of my favorite places to visit locally is a nearby Amish community.  There are some really neat little towns with great shops and restaurants.  One of those restaurants isn't the typical Amish buffet with fried chicken and homemade noodles that you tend to see in that are.  Rather, it is a small cafe that features a Cuban/Key West/South Florida menu and decor.  It's definitely not a restaurant you'd expect to find in a rural community.  It is my absolute favorite place to eat when we are in the area and I always order the same thing.  They have the best cuban sandwich and a scrumptious FLOURLESS CHOCOLATE CAKE with raspberry sauce and whipped cream!  It is FANTASTIC!  My mom says they also have the best Key Lime pie she's ever had!  I've been wanting to try my hand at making one of those flourless cakes for some time, but there are a lot of different methods for making this cake.   I finally found a recipe from Tyler Florence at the Food Network that seemed to be what I was looking for.  It's been awhile since I've been to that wonderful cafe, but this cake sure tasted a lot like what I had there!  I'm sure some will be wondering why I didn't take any photographs of the process of making this cake.  Well, I really wanted to get this right and there were a few steps I was unsure of so the camera got overlooked!  So sorry! 

I have listed the recipe below but I do want to point out a few things.  First of all, you will need a springform pan for this cake.  Secondly, I followed the recipe as closely as I could.  I've noted some specifics below.  Next, the only thing that didn't seem to go as expected was the beating of the egg whites.  Mine didn't quite make it to "stiff peaks" yet the cake turned out fine.  I even used my kitchenaid mixer to beat them for what seemed like a considerable amount of time.  My eggs were still cold from the fridge.  Did I need to have them at room temperature???  I have no idea.  If you have some knowledge in this area, please share it with us!!  :)  Finally, I also ended up baking the cake a little longer than the 25 minutes.  It was more like 35-40 minutes.   It was a little soft in the center but the rest of the cake was the perfect texture.  It has a wonderful velvety texture and the chocolate flavor is outstanding!  It will remind you of a brownie only much more decadent!  This is for serious chocolate lovers only!!!   I will definitely be making this again!!


Flourless Chocolate Cake


1 pound bittersweet chocolate, chopped into small pieces  (I used Ghiradelli bittersweet chocolate chips.)
 
1 stick unsalted butter   (I used salted butter.)
 
9 large eggs, separated
 
3/4 cup granulated sugar, plus 1 tablespoon
 
confectioner's sugar for dusting the cake
 
Preheat the oven to 350 degrees F. Butter a 9-inch springform pan.
 
Put the chocolate and butter into the top of a double boiler (or in a heatproof bowl) and heat over (but not touching) about 1 inch of simmering water until melted.

Meanwhile, whisk the egg yolks with the sugar in a mixing bowl until light yellow in color. Whisk a little of the chocolate mixture into the egg yolk mixture to temper the eggs - this will keep the eggs from scrambling from the heat of the chocolate; then whisk in the rest of the chocolate mixture.

Beat the egg whites in a mixing bowl until stiff peaks form and fold into the chocolate mixture. Pour into the prepared pan (spray the bottom with nonstick spray) and bake until the cake is set, the top starts to crack, and a toothpick inserted into the cake comes out with moist crumbs clinging to it, 20 to 25 minutes. Let stand 10 minutes before removing collar from springform pan.  Allow to cool completely and then dust with confectioner's sugar.

Shared on:

Everyday Mom's Meals Church Supper

Thursday, September 20, 2012

Frosted Butterfinger Bars

So I'm not a complete fanatic over Butterfingers like many people, but this recipe intrigued me and I just couldn't stop thinking about making these and they seemed to keep reappearing in my newsfeed on Facebook!  If you've never visted Hugs & Cookies XOXO, then you are in for a real treat!  She has the most amazing confections and she is famous for her bake-alongs!  So I decided to bake along!!!  However, I decided to take her recipe a step further and make these a frosted bar!  These were so scrumptions!!!!

 
You'll need some Butterfingers!!!!!


Crush 16 Butterfingers!  Measure out a cup for the bars and leave the rest for the frosting! 
Beat butter and brown sugar until light and fluffy. Beat in eggs and vanilla.
Add in the flour, powder, salt just until incorporated.  Fold in 1 cup of butterfingers.

 
Spread batter into pan lined with foil. . .  Bake at 350 degrees for 28-30 minutes.

 
For the frosting, beat 2 sticks of softened butter until fluffy.  Add in vanilla.  Continue to beat with electric mixer adding powdered sugar gradually.  Beat until light and fluffy.  Fold in remaining butterfingers.

Allow bars to cool completely before frosting! 


Frosted Butterfinger Bars

adapted from :  Hugs and Cookies XOXO

2 1/4 cups all purpose flour
1 teaspoon baking powder
1/2 teaspoon salt
3/4 cup butter, room temp
2 1/2 cups light brown sugar, packed
3 large eggs
1  teaspoon vanilla

16 snack size butterfingers, chopped divided (1 cup for bars- remainder for frosting)

Preheat oven to 350 degrees F. Line 13×9 pan with nonstick foil.
Beat butter and brown sugar until light and fluffy. Beat in eggs and vanilla.
Add in the flour, powder, salt just until incorporated.  Fold in 1 c. chopped butterfingers. Spread batter in pan.  Bake for 28-30 minutes.

Butterfinger Frosting
2 sticks butter
1 tsp. vanilla
4 cups powdered sugar
remainder of crushed Butterfingers

Note:  This frosting is very soft due to the amount of butter.  If you would like a sturdier frosting, exchange half of the butter for shortening.

Sunday, August 26, 2012

Speedy Brownies

Let me start off by saying that I've made these before and never had the opportunity to actually try one!  Well, last week our church had a potluck and I was scrambling for a sweet treat to take at the last minute when I came across this recipe.  Luckily, I had everything on the ingredient list which was a plus!  After they were finished and I was cutting them to put on a pretty plate to take to the potluck, I decided I would try one and they were "okay" I thought.  Well, at the potluck there was TONS of food and most everyone took at least a few leftovers home- me included.  Thankfully, there weren't too many of these!  With those leftover brownies at home, I soon found out that I really LOVED these.  I couldn't stay out of what I brought home!  These have a much different texture than a traditional brownie.  They are not a fudgy brownie, but rather more cake like!  The chocolate flavor is PERFECT!!  I will definitely be making these more often!!  By the way, this is a Taste of Home recipe.  I had held on to this recipe card and I'm glad I did!!


Speedy Brownies
from:  Taste of Home
 
2 cups sugar
1 3/4 cups flour
1/2 cup baking cocoa
1 t. salt
5 eggs
1 cup vegetable oil
1 t. vanilla extract
1 cup semisweet chocolate chips
 
In a mixing bowl, combine the first seven ingredients; beat until smooth.  Pour into a greased 9x13 pan.  (I lined mine with aluminum foil.)  Sprinkle batter with chocolate chips.  Bake at 350 degrees for 30 minutes or until a toothpick inserted near the center comes out clean.  Cool in pan on wire rack.  (After about 10 minutes, I used the foil to remove them to a cooling rack- careful, it's hot!)  Cool completely and cut into squares!

Monday, August 6, 2012

Parm-breaded Pork Chops

My mom has a new subscription to Taste of Home magazine and she's been bringing them to me when she's finished reading.  Aren't I a lucky girl??  A few months ago, I found this recipe and just had to try it.  They turned out good but I wanted to omit the butter in the recipe and use olive oil spray instead.  I thought the butter made the breading a little soggy, but the flavor was great and the chops were so tender. The original recipe called for 6 chops and even though I only made 4, I did use almost all of the breading so they were well-coated.   I don't think I would have had enough breading for 6 chops. 

My husband really liked these so I knew I needed to make them again with the necessary changes.  Well, the next time I went to make them, I couldn't find the recipe.  I knew I had clipped it from the magazine and put it somewhere.  I searched and searched!  I even tried searching on their website, but I had to have a subscription to look at their recipes.  I was seriously bummed out because I wanted to make them again so badly.  Weeks later it turned up in a stack of recipes I had set aside!  I was so relieved!!  The next time I made these I used olive oil spray instead and the breading was much better.  My hubby is such a picky eater and he really likes these!  This is my new favorite dinner recipe!!!  Yummy!


Place flour in a bowl.  In another bowl, combine egg and milk.  In a third bowl, combine the crushed crackers, cheese, salt, and pepper.  Dip each chop in flour mixture, then egg mixture, and finally the cracker mixture.  Place in a 13x9 pan sprayed with olive oil spray.  Spray tops of breaded chops with additional olive oil spray.  This will help them brown nicely!


Bake at 350 degrees for 25-30  minutes or until cooked through.  Let stand a few minutes before serving.

Parm-breaded Pork Chops
adapted from:  Taste of Home

1/4 cup all-purpose flour
1 egg
2 T. milk
1 cup crushed butter-flavored crackers (I used Townhouse crackers.)
3 T. grated Parmesan
1/2 t. salt
1/8 t. pepper
olive oil spray
4-5 boneless pork chops  (You could probably do 6, but VERY lightly breaded).

Place flour in a bowl. In another bowl, combine egg and milk. In a third bowl, combine the crushed crackers, cheese, salt, and pepper. Dip each chop in flour mixture, egg mixture, and cracker mixture. Place in a 13x9 pan sprayed with olive oil spray. Spray tops of breaded chops with additional olive oil spray.   Bake at 350 degrees for 25-30 minutes or until cooked through. Let stand a few minutes before serving.

Note:  I recently made these again and didn't realize I was out of crackers so I used Panko bread crumbs and they were delicious!!

Shared on:

Everyday Mom's Meals Church Supper

Wednesday, July 25, 2012

Quiche Cups

Several years ago, I tried following the South Beach Diet plan.  At that time, I was perusing the South Beach diet book and found a recipe for veggie quiche cups.  They used Egg Beaters and spinach.  You baked them in muffin tins and stored them in the freezer.  I loved them because they were very easy to reheat on busy mornings.  As I'm now trying to shed some baby weight, I've been looking for some low carb recipes and more specifically low carb breakfast recipes.  The South Beach recipe was the first to come to mind.  Then, a friend of mine shared a recipe for Breakfast bites and I tried that one but didn't have all the ingredients on hand so I had to improvise a little.  They also required a mini muffin pan and the batch I tried stuck to the pan terribly.  Still delicious, but it was a big mess!  After that, I began thinking about the South beach recipe and decided I would go back to that portion size (and the standard muffin pan I'm accustomed to using without anything sticking) and try to incorporate what I tried with the Breakfast bite recipe.  The combined attempt turned out great and I will definitely be making more of these for the freezer!  With a 2 month old and 2 year old, this momma has little time to cook in the morning!!


Did I mention these are super easy????


Start by heating 1 T. of butter in a skillet and then adding 1 cup of onion seasoning blend.  If you've never tried the onion seasoning blend, you can find it in the freezer section.  It is a frozen blend of onions, celery, red peppers, and parsley.  Cook mixture 3-4 minutes or until onions are tender.


Add in 4 slices of chopped deli ham and cook for about another minute.


Allow the mixture to cool slightly (about 5-10 minutes).


In a mixing bowl, combine 6 eggs, 1/2 tsp. Italian seasoning blend, 1 cup mozzarella cheese, and pepper to taste.  Add in cooled skillet mixture.


I used an 1/8 cup measuring cup to ladle the mixture into a prepared standard 12-cup muffin tin. 


I baked them at 350 degrees for 20 minutes. Note:  I used a dark nonstick pan so you may need to adjust your cooking time.  Make sure the eggs are set before removing from oven.


 Store them in the fridge for 2-3 days or place them in ziploc bags and lay flat in the freezer.  From refrigerated state, I heated mine for 30 seconds in the microwave.  From frozen, it takes about a minute.


Quiche Cups

created by me with inspiration from the South Beach Diet and The World According to Eggface

1 cup frozen onion seasoning blend
1 T. butter
4 slices deli ham, chopped
6 eggs
1/2 t. Italian seasoning
black pepper to taste
1 cup mozzarella cheese

Cook onion blend in butter in skillet over medium heat until onions are tender.  Add in ham and cook another minute.  Cool mixture for 5-10 minutes.  In the meantime, preheat oven to 350 degrees.  In a mixing bowl, combine eggs, Italian seasoning, black pepper, and mozzarella cheese.  Add in ham/onion  mixture and stir until combined.  Ladle 1/8 cup of mixture into each cup of a prepared standard 12-cup muffin tin.  Bake at 350 degrees for about 20 minutes or until eggs are set.

Shared on:
Everyday Mom's Meals
Recipes for My Boys
Gooseberry Patch Recipe Roundup


Goulash